Monday, April 29, 2013

validated

Yes, I have been validated. 

You know my addiction love for Crumb Cake cardstock, right?  Well, I actually went out of my comfort zone to make a card for our group last week.  I used Melon Mambo. 

Lord help me.  So not my color.

Then I made the same card using a larger sentiment so my ladies could see what it would look like should they choose to use a larger sentiment. 

And, I made it with Crumb Cake. 

I gave them the option of either color and do you know which color every one of them chose? 

Crumb Cake, thank you very much. 

 Ready?  Get your sunglasses on.


Blooming with Kindness and Teeny Tiny Wishes.  Melon Mambo, basic black and whisper white cardstock.  Melon mambo and black Stazon inks.  White taffeta ribbon, vintage faceted buttons, dryer sheets, dazzling diamonds glitter, big shot, clear scallop square die, white bakers twine. 


Our hostess this month wanted to do the dryer sheet technique.  You usually need a bold image behind to stand out and this was the first one I thought of. 

It actually came out just like I pictured it in my mind.  That never happens. 


Here you can kinda sorta see the glitter.  I'm not much for glitter and so didn't put too much on. 

The black piece opens so you can write on the inside.  A picture of that would have been good huh? 

Okay, want to know how to do the Dryer Sheet Technique?  I did not take pics but its pretty easy to explain. 

  1. stamp your image and let dry
  2. spread glue over the whole piece of cardstock.  I used Crystal Effects but you could use good ol' white glue.  Lay it on fairly thick.  You want it soak through the dryer sheet.
  3. place your used dryer sheet over the top and smooth out.  You can see where mine has a few bubbles in it.  I say it just adds character.
  4. cut around the edges.
  5. sprinkle glitter over the top.  
  6. let dry and you're done!

The glue and/or Crystal Effects will warp your cardstock.  After it dried I adhered mine to another piece of whisper white to stabilize it.


Ready for Crumb Cake?


Blooming with Kindness set.  Baja Breeze, crumb cake and whisper white cardstock.  Baja breeze and black Stazon.  Vintage faceted buttons, used dryer sheets, linen thread, big shot, clear scallop square die, dazzling diamonds glitter, crystal effects. 

Okay, so there isn't that much Crumb Cake on here.  The Crumb cake part is the part that opens for the message. 


Alrighty then, thats it from me today.  Did you watch Mr. Selfridge last night?  I'm just loving this show and so happy Mr. Crabb pulled the wool over on Mr. Grove. 

Thanks so much for stopping by and hanging out. 

Blessings, b.


Sunday, April 21, 2013

peach blanket?

Happy Sunday!  I hope you all had a wonderful weekend.  I was busy here.......and it was hot.  Blech!  I'm not ready for summer.  But right now, it is 5:54 on a Sunday evening and it feels pretty darn perfect outside. 

I wanted to show you what I planted this weekend but first I have a card to show you. 


Up Up and Away and Teeny Tiny Wishes sets.  Crumb cake and whisper white cardstock.  Pumpkin pie, early espresso and black Stazon inks.  Sunshine and sprinkles DSP, corner rounder and black marker. 

This is almost an exact case of a card made by Jen Nelson.  It is so simple and fun.  I've been wanting to use this DSP and this was the perfect card for it.  I never have enough birthday cards. 

You can see where the faux stitching is a little wonky on 2 of the corners.  Thats because after I already did the stitching I decided I wanted to cut down the panel a little more.  Oh well, I still think its cute. 


This came the other day.


One of the things that held me back from ordering it before was the price.  Now that it is only $19.95 I had to get it.  I haven't opened it yet though.  I'm really computer challenged and I figure I'll need a weekend or so to figure it out. 

Ok, now for a little gardening news. 

I still haven't gotten all the veggies planted.  I wanted to put in some bug killer first and let that work.  So yesterday Grace and I went to the nursery.  I got so excited over all the plants I never even made it inside to get the bug killer.  OY!

But look what is already blooming in the backyard


This is one of the seeds the birds planted from last years plants.  It has 18 buds on it.  Aren't those birds helpful? 

Anyhow, this year I decided I'm really going to get my yards done.  I can afford to buy the plants but I can't afford the labor to get the yard ready.  So if the heat doesn't kill me then hopefully I'll at least lose a few pounds and get a pretty yard to boot. 

I started in the front yard.


This is a Mesa Peach Blanket.  It looks just like the inside of a peach!  I'm telling you, the people that come up with these names are just so clever.


Lots of Gerberas.  I just love these.  I got them in different colors too.


Sweet Broom.  This smells pretty good. 

I still have alot more planter to fill.  Oh yeah, I also got a few African Boxwood.  The front yard whooped me today and I didn't get anything done in the backyard.  But I've got ideas. 

Alrighty then, thats it for today.  I have more stampy stuff to show you too.

Thanks for stopping by and hanging out with me and listening to my stories. 

Blessings, b.

Sunday, April 14, 2013

baby x 2

Hidey Ho!

I promise to keep this short and sweet tonight.....Mr. Selfridge is coming on. Are you watching it?


A friend at work just had twin grandbabies.   So I made a cute little tag to go on the gift. 


Thats the Ticket and Distressed Dots sets.  Crumb cake, marina mist, bashful blue and whisper white cardstock.  Whisper white and marina mist inks.  Big shot, polka dot embossing folder, scallop border punch, bitty buttons, white bakers twine, label framelits, simple letters die (retired).


One of the babies names starts with a "p" and one with a "d".  I made a slightly larger tag like the Leprechaun tag. 


I dyed the white bakers twine with the Marina Mist ink.  I didn't use the matching punch because I wanted the tickets to be connected.  So I just used my handy dandy paper snips and cut around them. 

Alrighty then, thats all for tonight. I hope to be a little more regular here on the blog-o. 

Thanks for stopping by and hanging out. 

Blessings, b.

Saturday, April 6, 2013

winner!

Hey there! 

Once again, sorry about my lack of posting.  Family life has been intense around here lately.  Not all in a bad way though.  I'm feeling the need to share so grab a drink and maybe even a snack. 

Scroll down to the end if you just want to see stamping.

A few weeks ago 18 came home for Spring Break. 


She was a little bummed that only one of her friends was also on Spring Break.  Why have them do it so early?  She has been wanting to paint her room for a long time so I suggested she and her friend conquer it.  The teal is the new color.  She painted a large section on one wall with chalkboard paint.  Looks pretty cool.

She wasn't home for Easter and it broke my heart.  We had tentatively planned on driving up there so we could be together but something came up that I'll explain in a minute.  She was able to go home and spend Easter with one of her friends at school so at least she wasn't by herself. 


While she was here I got the garden started.  So far these are the seeds I've got. 


The broccoli I planted in Nov. has given me a pretty good harvest but I'm ready to pull the plants out now.  The brussel sprouts got INVADED (I'm talking they had condos set up in there) with earwigs and there was no way I could get them all out.  Gross!  I threw the whole dang plant away. 

So far I only have the pumpkins and sunflowers in the ground.  I need some bug killer before I plant the others.  The grapes are going like gangbusters though.  I bet I have 6 dozen grape clusters on the two plants. 


I had to share this.  The Boy was bored the afternoon I was planting (help mom?  No way!) and wanted to play some darts.  This particular game lasted a few hours!  He did win..........like always.  But I had to show that I did get a BULLSEYE!  Go Mom Go!


Then 2 1/2 weeks ago my father in law had a stroke.  Luckily it wasn't too severe.  He is still in rehab and slightly improving.  They live 1 1/2 hours away and The Hubs has been there almost every day.  Needless to say we haven't seen him too much.  Pop will be 89 next Sunday.  I'm so proud of the way The Hubs has been handling everything. 


As for me?  Well, were friends here right?  The Big M is killing me!  Yes, I said it........... MENOPAUSE.  I mean, really.  Women got the short end of the stick here.  Mood swings?   Not so much.....yet I'm sure.  But the periods?  UGH!  AND, the dr. says it could last another 5-7 years!  Really?  I won't go into detail but if you'd like commiserate with me....drop me a line. 


So I haven't been feeling all that swell and haven't been stamping as much as I should.  But today was the middle school band golf tournament.  The Hubs asks half an hour before he has to leave if I could decorate some envelopes.  Lucky for me I am feeling pretty perky today and this is what I came up with. 


Blue Ribbon set.  Whisper white envelopes.  Not quite navy and Versamark inks.  Silver embossing powder, 1 3/4" scallop circle punch and stampamajig. 


I know you can't see much detail here.  I was trying to take a pic in the garage before he was taking them away. 

The school colors are teal and silver.  We don't really have a teal color anymore (although Bermuda Bay is making a comeback) so I used Not Quite Navy.

For the middle punch, I stamped the Not Quite Navy with the "winner" stamp and then punched it out twice with the scallop punch.  Just punch once. Then I used a sticky note and stuck the scallop on there and lined up the scallop punch again, offsetting it, and punched again.  That will give you a pointy scallop.  Cool eh?  


Here they are with the little trophies.  Each envelope has a gift card in it.  These are for the 1st place foursome. 

I hope The Hubs will have a great time today.  He deserves a little down time. 

Alrighty then, thats it for today.  I do have some baby things to show you.  Seems like everyone is procreating around here lately. 

Thanks so much for stopping by.  I love when you do that.

Blessings, b.

Saturday, March 9, 2013

Lucky Charms

Happy Saturday!  I had kind of a lazy day today.  I had every good intention but I fell off the path somewhere along the way.  Tomorrow will be different.

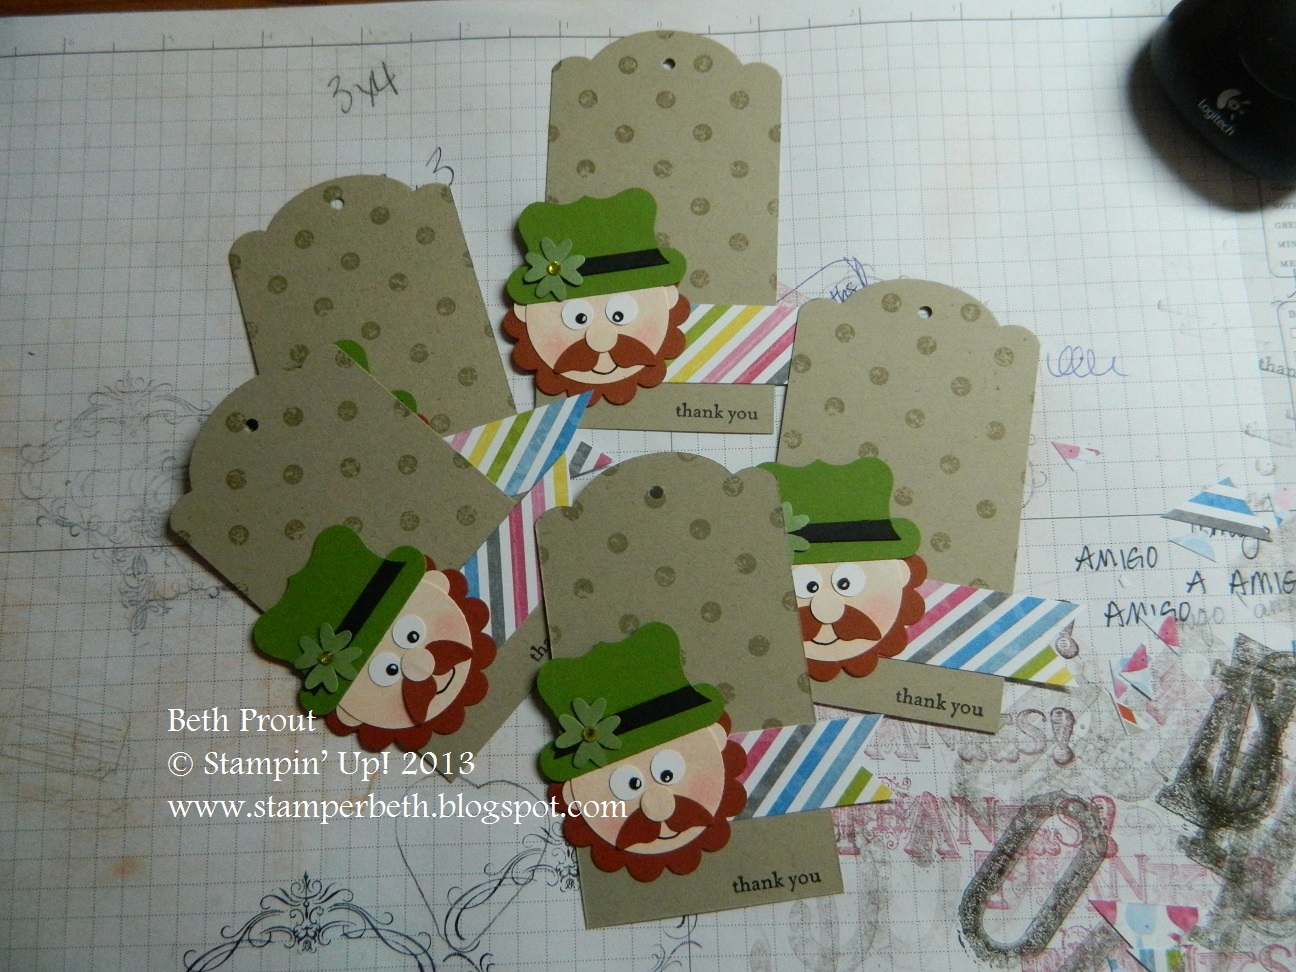
Today I wanted to show you the bag tags I made for my club ladies.  There are LOTS of pics so grab a drink and maybe even a snack.  I'll wait..................

Ready?


Teeny tiny wishes and distressed dots background.  Crumb cake, blush blossom, pretty in pink and black Stazon inks.  Crumb cake, cajun craze, whisper white, gumball green, wild wasabi and basic black cardstock.  Curly label punch, 1 3/4" scallop punch, owl builder punch, bitty butterfly punch, word window punch1 3/8" circle punch, big shot, label framelits, rhinestones and sunshine and sprinkles DSP. 

Thats alot of supplies there.  Whew!  Now that I look at the little guy, his eyes are a little wonky.  I guess he had too much green beer.

So I've put together a picture tutorial on how to make him.  Its pretty self explanatory but heck, I've got nowhere to go.

Lets do this!


I didn't have any Blush Blossom cardstock.  This color was retired a loooooong time ago but, you can still buy the marker in this color. 

So since I didn't have any cardstock, I decided to make my own. 

Take some white cardstock.......


..................and just rub your ink pad over it until you have the right depth of color you want. 

Rocket science huh?

And then, I didn't take a pic of this but punch out a circle with your 1 3/8" circle punch.


I used my 1 3/4" scallop punch to get this.  I lopped off the top but you don't really need to.


Stick your blush blossom circle on there.  Note:  I had decided I didn't have enough Blush Blossom ink on there so I made some more paper and punched a new circle later.


Now for the hat.  Cut a gumball green curly label in half on the long side, so the short sides are intact.


I just freehanded a strip of black cardstock and glued it on.  Trim it to fit.  You'll also notice I punched some gumball green with the word window punch. 


Then put them together. 


Now get out your owl punch and punch out 4 cute little hearts.  This is wild wasabi.  I love this owl punch although I will admit, I never make owls with it.


Now get your magnifiers on because you're old and can't see up close anymore and put a drop of glue on your hat.  This was not enough and I had to add more..........just so you know.  Place the hearts on the glue to form a shamrock.


When we started selling the rhinestones, I bought a whole pack of colored Sharpies just for this.  So color a rhinestone yellow and stick it in the middle of your shamrock.  I just wanted the idea of gold represented somewhere on my little guy.


Stick the hat your head.


Once again, use your owl punch to make some eyes.  Did you know you can just press the tip of your paper snips on the dot and it will pick it up?  Yep, works great.  Use your white gel pen to add some character.


Add some pretty in pink cheeks.  I did this before I decided he needed a mustache.  Don't forget to punch out some ears too.  I just used the owl punch again.


I had bought this Bitty Butterfly punch from the Spring Catalog in Jan. and I've never used it.  I think it makes the perfect bushy mustache.  I'm just showing you how I cut it apart here.


I don't have the Two Tags die so I rigged up my own.  This was a 2 1/4" x 4" strip of crumb cake.  Roll it through the machine only half way and then roll it back out.  Just so it cuts the top.


Nifty huh? 


Here they are all together.  Sorry about the dirty background paper.  Geez...what a slob!

I used the Sunshine and Sprinkles DSP from the Spring Catalog for the strip because it makes me think of rainbows.  Right after I had gotten them done and had handed out a few of the bags, I realized they would have been cuter on either a white or blue tag with white polka dots.  But I decided I wasn't going to redo them.  They are still cute. 

Alrighty then.   I'm heading to bed.  I want to be bright-eyed and bushy-tailed for everything I need to do tomorrow. 

Thanks so much for stopping by.  I love that you do that.

Blessings, b.


Wednesday, February 27, 2013

thanks x 3

Hey there!  I hope everyone in the midwest is staying safe in the crazy snow I see on the news.  Crazy snow!

I finally downloaded the pictures off the camera.  So I have a few things to show you.


Vintage Verses (SAB) set.  Basic gray and Versamark inks.  Sahara sand, whisper white and island indigo cardstock.  Sycamore street DSP (SAB), beautiful butterflies die, big shot, linen thread, dotted ribbon punch, pool party button (SAB), polka dot embossing folder and dimensionals.


I needed some thank yous and had just gotten my SAB goodies.  I'm loving this pattern on the Sycamore Street DSP. 


I used my basic gray marker to ink up just the frame part of one of the stamps in the Vintage Verses set (SAB).  I really liked how this card came out. 


We had our stamp club meeting last week and I wanted to use this same card but I ran out of the Island Indigo cardstock.  So I used another pattern in the Sycamore Street DSP and used Rich Razzleberry cardstock. 


I used clear embossing powder on this one.  It was just what it needed to make those words pop!


Alrighty then, thats all for tonight.  I'm going to finish watching Survivor and go to bed.  I've got more things to show you soon.

Thanks for stopping by.

Blessings, b.

Tuesday, February 19, 2013

back from the beyond

Hidey Ho!  What a crazy last few weeks I've had.  

I had planned on showing you some pics while I was gone but I forgot my camera cord. 

Then, when I got home, the router broke.  So no internet.  Oy! 

But things are back to normal around here.  Whatever normal is.

So let me show you the Valentine creations I made.


Thats the Ticket set.  Real red ink.  Whisper white cardstock.  Real red stitched grosgraing, ticket punch and white bakers twine. 

These are some Valentines I sent to 18 for her friends.


same supplies

These are the ones we made for Grace to hand out.


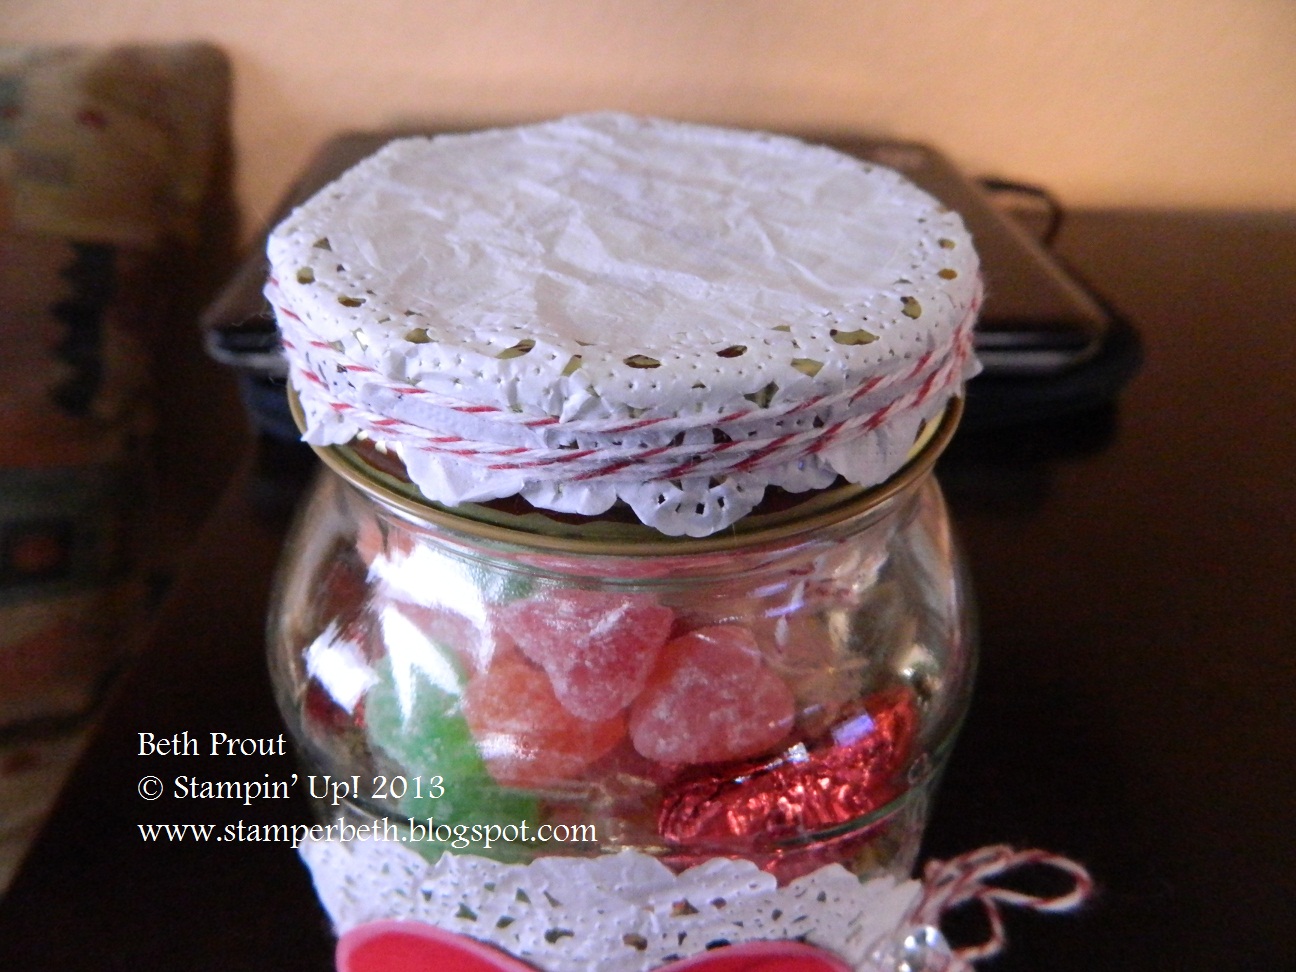
Worn Alphabet (retired).  Whisper white craft ink.  Real red cardstock.  Paper doily (spring catalog), bakers twine, vintage faceted button.  


I was under the gun to get this sent out to 18 in time for Valentine's.  I used an old spaghetti jar. 


I seem to like the doilies better when wrinkled.  Kind of like me, I guess.


Worn Alphabet (retired), woodgrain and Fabulous Phrases.  Real red and crumb cake cardstock.  Whisper white craft and real red ink.  Paper doily, labels framelits, big shot, vintage faceted button, designer silver basics buttons, natural trim, bakers twine, jewelry tag punch, linen thread and sticky rhinestones.

I do not have a heart punch or die so, I had to make these hearts the old fashioned way.  Fold a piece of cardstock and cut it out. 


For Grace


For The Boy.  When Grace saw his she said, "why does he get the pretty button?"  Geez.....


Since I had more time for these I just spray painted the lids.  Much easier. 


No stamps!  No ink!  Crumb cake cardstock.  Really really really old DSP, sewing machine and paper piercer.


This is the card I made for The Hubs.  I saw a card almost exactly like this in last months PaperCrafts mag. 

I lightly drew the heart with a pencil and then used my paper piercer to very carefully scratch the design in. Because of course my paper piercer is slightly bent at the very tip.  


This is what The Hubs made me.  Its mahogany.  So pretty!  I love wood.  Betcha couldn't tell huh?


Alrighty then, that was our Valentine's Day.  I know its late but maybe you can use these ideas for something else.   Or just save them for next year. 

Thanks so much for stopping by and hanging out.  You give me warm fuzzies......in a good way.

Blessings, b.