Happy Saturday! I had kind of a lazy day today. I had every good intention but I fell off the path somewhere along the way. Tomorrow will be different.
Today I wanted to show you the bag tags I made for my club ladies. There are LOTS of pics so grab a drink and maybe even a snack. I'll wait..................
Ready?
Teeny tiny wishes and distressed dots background. Crumb cake, blush blossom, pretty in pink and black Stazon inks. Crumb cake, cajun craze, whisper white, gumball green, wild wasabi and basic black cardstock. Curly label punch, 1 3/4" scallop punch, owl builder punch, bitty butterfly punch, word window punch1 3/8" circle punch, big shot, label framelits, rhinestones and sunshine and sprinkles DSP.
Thats alot of supplies there. Whew! Now that I look at the little guy, his eyes are a little wonky. I guess he had too much green beer.
So I've put together a picture tutorial on how to make him. Its pretty self explanatory but heck, I've got nowhere to go.
Lets do this!
I didn't have any Blush Blossom cardstock. This color was retired a loooooong time ago but, you can still buy the marker in this color.
So since I didn't have any cardstock, I decided to make my own.
Take some white cardstock.......
..................and just rub your ink pad over it until you have the right depth of color you want.
Rocket science huh?
And then, I didn't take a pic of this but punch out a circle with your 1 3/8" circle punch.
I used my 1 3/4" scallop punch to get this. I lopped off the top but you don't really need to.
Stick your blush blossom circle on there. Note: I had decided I didn't have enough Blush Blossom ink on there so I made some more paper and punched a new circle later.
Now for the hat. Cut a gumball green curly label in half on the long side, so the short sides are intact.
I just freehanded a strip of black cardstock and glued it on. Trim it to fit. You'll also notice I punched some gumball green with the word window punch.
Then put them together.
Now get out your owl punch and punch out 4 cute little hearts. This is wild wasabi. I love this owl punch although I will admit, I never make owls with it.
Now get your magnifiers on because you're old and can't see up close anymore and put a drop of glue on your hat. This was not enough and I had to add more..........just so you know. Place the hearts on the glue to form a shamrock.
When we started selling the rhinestones, I bought a whole pack of colored Sharpies just for this. So color a rhinestone yellow and stick it in the middle of your shamrock. I just wanted the idea of gold represented somewhere on my little guy.
Stick the hat your head.
Once again, use your owl punch to make some eyes. Did you know you can just press the tip of your paper snips on the dot and it will pick it up? Yep, works great. Use your white gel pen to add some character.
Add some pretty in pink cheeks. I did this before I decided he needed a mustache. Don't forget to punch out some ears too. I just used the owl punch again.
I had bought this Bitty Butterfly punch from the Spring Catalog in Jan. and I've never used it. I think it makes the perfect bushy mustache. I'm just showing you how I cut it apart here.
I don't have the Two Tags die so I rigged up my own. This was a 2 1/4" x 4" strip of crumb cake. Roll it through the machine only half way and then roll it back out. Just so it cuts the top.
Nifty huh?
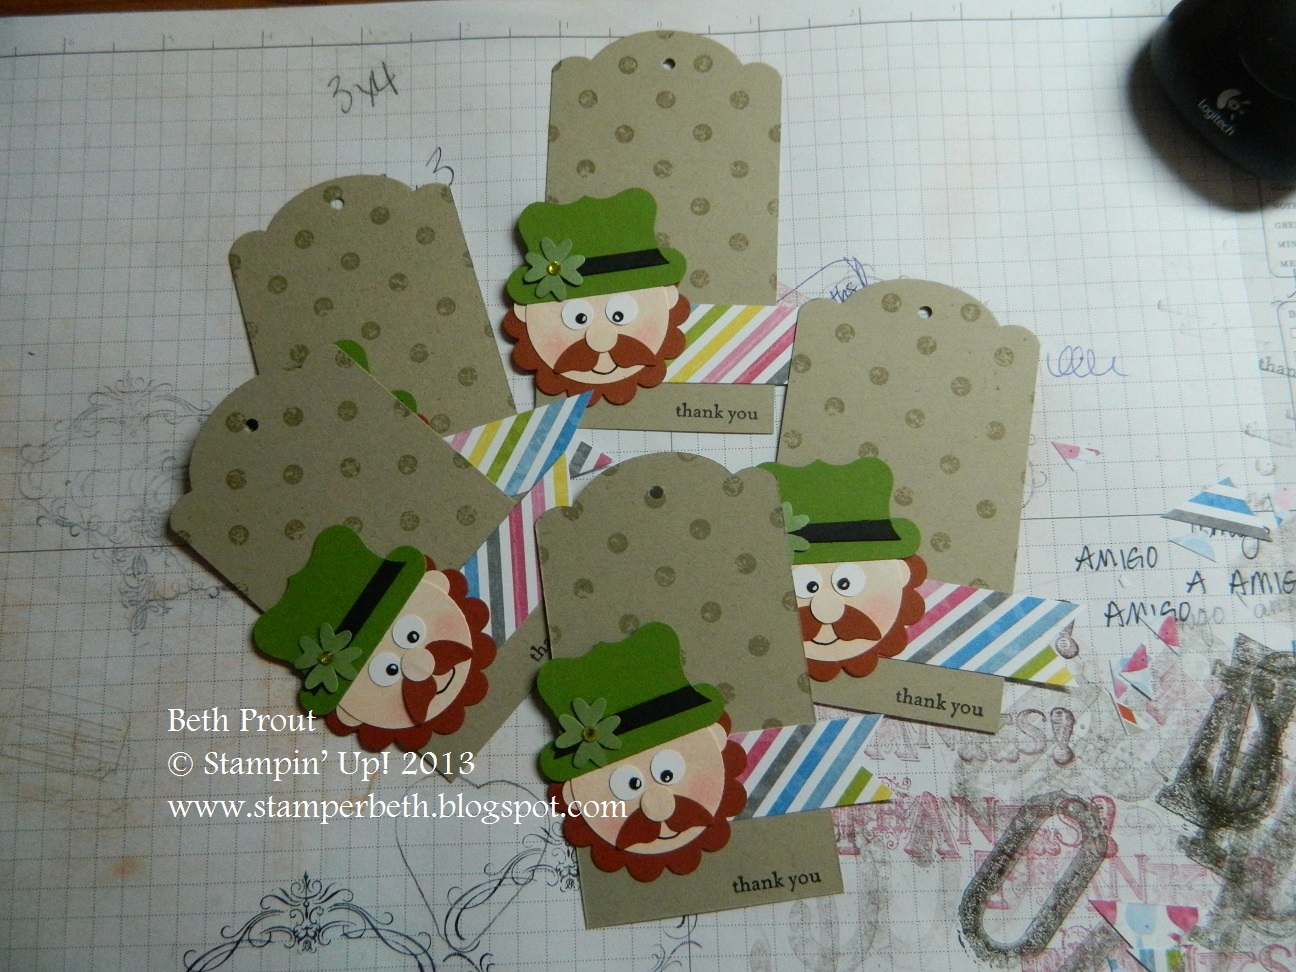
Here they are all together. Sorry about the dirty background paper. Geez...what a slob!
I used the Sunshine and Sprinkles DSP from the Spring Catalog for the strip because it makes me think of rainbows. Right after I had gotten them done and had handed out a few of the bags, I realized they would have been cuter on either a white or blue tag with white polka dots. But I decided I wasn't going to redo them. They are still cute.
Alrighty then. I'm heading to bed. I want to be bright-eyed and bushy-tailed for everything I need to do tomorrow.
Thanks so much for stopping by. I love that you do that.
Blessings, b.
Saturday, March 9, 2013
Wednesday, February 27, 2013
thanks x 3
Hey there! I hope everyone in the midwest is staying safe in the crazy snow I see on the news. Crazy snow!
I finally downloaded the pictures off the camera. So I have a few things to show you.
Vintage Verses (SAB) set. Basic gray and Versamark inks. Sahara sand, whisper white and island indigo cardstock. Sycamore street DSP (SAB), beautiful butterflies die, big shot, linen thread, dotted ribbon punch, pool party button (SAB), polka dot embossing folder and dimensionals.
I needed some thank yous and had just gotten my SAB goodies. I'm loving this pattern on the Sycamore Street DSP.
I used my basic gray marker to ink up just the frame part of one of the stamps in the Vintage Verses set (SAB). I really liked how this card came out.
We had our stamp club meeting last week and I wanted to use this same card but I ran out of the Island Indigo cardstock. So I used another pattern in the Sycamore Street DSP and used Rich Razzleberry cardstock.
I used clear embossing powder on this one. It was just what it needed to make those words pop!
Alrighty then, thats all for tonight. I'm going to finish watching Survivor and go to bed. I've got more things to show you soon.
Thanks for stopping by.
Blessings, b.
I finally downloaded the pictures off the camera. So I have a few things to show you.
Vintage Verses (SAB) set. Basic gray and Versamark inks. Sahara sand, whisper white and island indigo cardstock. Sycamore street DSP (SAB), beautiful butterflies die, big shot, linen thread, dotted ribbon punch, pool party button (SAB), polka dot embossing folder and dimensionals.
I needed some thank yous and had just gotten my SAB goodies. I'm loving this pattern on the Sycamore Street DSP.
I used my basic gray marker to ink up just the frame part of one of the stamps in the Vintage Verses set (SAB). I really liked how this card came out.
We had our stamp club meeting last week and I wanted to use this same card but I ran out of the Island Indigo cardstock. So I used another pattern in the Sycamore Street DSP and used Rich Razzleberry cardstock.
I used clear embossing powder on this one. It was just what it needed to make those words pop!
Alrighty then, thats all for tonight. I'm going to finish watching Survivor and go to bed. I've got more things to show you soon.
Thanks for stopping by.
Blessings, b.
Tuesday, February 19, 2013
back from the beyond
Hidey Ho! What a crazy last few weeks I've had.
I had planned on showing you some pics while I was gone but I forgot my camera cord.
Then, when I got home, the router broke. So no internet. Oy!
But things are back to normal around here. Whatever normal is.
So let me show you the Valentine creations I made.
Thats the Ticket set. Real red ink. Whisper white cardstock. Real red stitched grosgraing, ticket punch and white bakers twine.
These are some Valentines I sent to 18 for her friends.
same supplies
These are the ones we made for Grace to hand out.
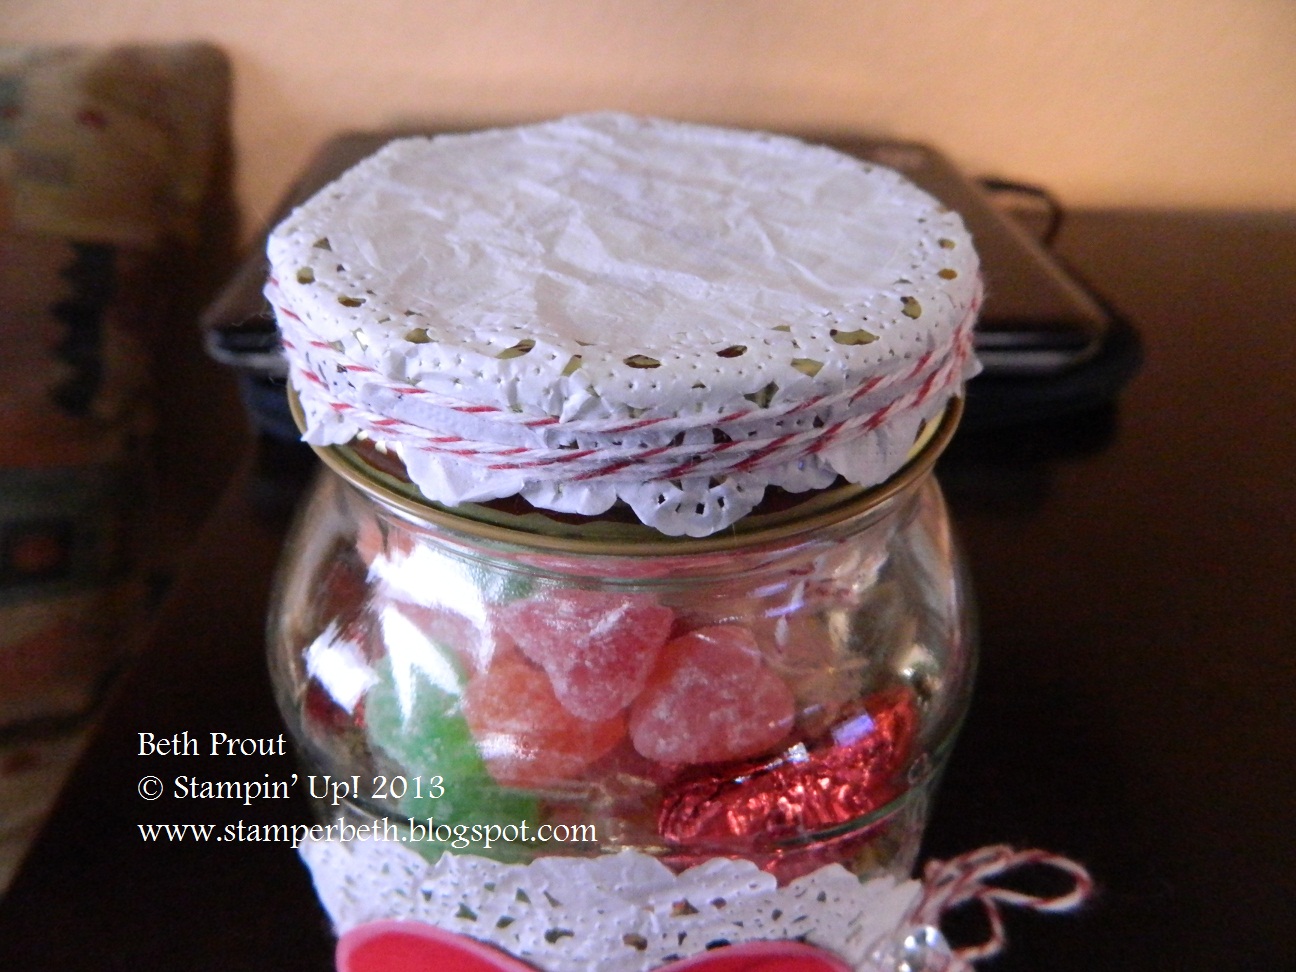
Worn Alphabet (retired). Whisper white craft ink. Real red cardstock. Paper doily (spring catalog), bakers twine, vintage faceted button.
I was under the gun to get this sent out to 18 in time for Valentine's. I used an old spaghetti jar.
I seem to like the doilies better when wrinkled. Kind of like me, I guess.
Worn Alphabet (retired), woodgrain and Fabulous Phrases. Real red and crumb cake cardstock. Whisper white craft and real red ink. Paper doily, labels framelits, big shot, vintage faceted button, designer silver basics buttons, natural trim, bakers twine, jewelry tag punch, linen thread and sticky rhinestones.
I do not have a heart punch or die so, I had to make these hearts the old fashioned way. Fold a piece of cardstock and cut it out.
For Grace
For The Boy. When Grace saw his she said, "why does he get the pretty button?" Geez.....
Since I had more time for these I just spray painted the lids. Much easier.
No stamps! No ink! Crumb cake cardstock. Really really really old DSP, sewing machine and paper piercer.
This is the card I made for The Hubs. I saw a card almost exactly like this in last months PaperCrafts mag.
I lightly drew the heart with a pencil and then used my paper piercer to very carefully scratch the design in. Because of course my paper piercer is slightly bent at the very tip.
This is what The Hubs made me. Its mahogany. So pretty! I love wood. Betcha couldn't tell huh?
Alrighty then, that was our Valentine's Day. I know its late but maybe you can use these ideas for something else. Or just save them for next year.
Thanks so much for stopping by and hanging out. You give me warm fuzzies......in a good way.
Blessings, b.
I had planned on showing you some pics while I was gone but I forgot my camera cord.
Then, when I got home, the router broke. So no internet. Oy!
But things are back to normal around here. Whatever normal is.
So let me show you the Valentine creations I made.
Thats the Ticket set. Real red ink. Whisper white cardstock. Real red stitched grosgraing, ticket punch and white bakers twine.
These are some Valentines I sent to 18 for her friends.
same supplies
These are the ones we made for Grace to hand out.
Worn Alphabet (retired). Whisper white craft ink. Real red cardstock. Paper doily (spring catalog), bakers twine, vintage faceted button.
I was under the gun to get this sent out to 18 in time for Valentine's. I used an old spaghetti jar.
I seem to like the doilies better when wrinkled. Kind of like me, I guess.
Worn Alphabet (retired), woodgrain and Fabulous Phrases. Real red and crumb cake cardstock. Whisper white craft and real red ink. Paper doily, labels framelits, big shot, vintage faceted button, designer silver basics buttons, natural trim, bakers twine, jewelry tag punch, linen thread and sticky rhinestones.
I do not have a heart punch or die so, I had to make these hearts the old fashioned way. Fold a piece of cardstock and cut it out.
For Grace
For The Boy. When Grace saw his she said, "why does he get the pretty button?" Geez.....
Since I had more time for these I just spray painted the lids. Much easier.
No stamps! No ink! Crumb cake cardstock. Really really really old DSP, sewing machine and paper piercer.
This is the card I made for The Hubs. I saw a card almost exactly like this in last months PaperCrafts mag.
I lightly drew the heart with a pencil and then used my paper piercer to very carefully scratch the design in. Because of course my paper piercer is slightly bent at the very tip.
This is what The Hubs made me. Its mahogany. So pretty! I love wood. Betcha couldn't tell huh?
Alrighty then, that was our Valentine's Day. I know its late but maybe you can use these ideas for something else. Or just save them for next year.
Thanks so much for stopping by and hanging out. You give me warm fuzzies......in a good way.
Blessings, b.
Sunday, January 27, 2013
I'm pooped
Once again I'm apologizing for my lack of posting. January started out so fun but its gone downhill and I'm just emotionally and physically pooped.
First some fun things.
My hours at work have been extended. I now work more hours per day....which is a good thing.....but it has taken some getting used to. God Bless my Asst. Principal, as she really went to bat for me. Love her!
The Hubs has finally gotten his own job site to manage. He is excited to try his own wings. I know he'll do a great job.
18 went back to school and now has her own room. She loves it!
I got a SU! order. I haven't played with any of it! But I wanted to show you these buttons.
These are the Basic Designer Buttons 129325, in the Spring Catalog. The big one is just so much bigger than I expected. So I thought I'd show you how big it is in comparison to a quarter.
Then the other day I got a letter.
My 10 year anniversary came and went. I didn't even remember.
Now the downhill part.
This is my dad and grandma on New Year's Eve. I know they don't look too happy here but trust me they were. They are so much alike.
My grandma passed away last Monday. She was 92. I'm so glad I got to see her one last time and kiss and hug on her.
I'll be going back to Iowa in a few weeks to help my cousin straighten things out with her estate. Grandma was a tough old broad and left specific instructions that no memorial be held and to not even put her ashes in the cemetery until all the snow is gone. My cousin is having a really hard time with that.
So life has been a little topsy turvy lately. Now that I have my travel stuff decided I'm feel like I'm coming up for air. Things are settling down a little.
I have cards to stamp before I leave so I hope I'll be able to show you something stampy here pretty soon.
Thanks so much for stopping by and checking in. You warm my heart.
Blessings, b.
First some fun things.
My hours at work have been extended. I now work more hours per day....which is a good thing.....but it has taken some getting used to. God Bless my Asst. Principal, as she really went to bat for me. Love her!
The Hubs has finally gotten his own job site to manage. He is excited to try his own wings. I know he'll do a great job.
18 went back to school and now has her own room. She loves it!
I got a SU! order. I haven't played with any of it! But I wanted to show you these buttons.
These are the Basic Designer Buttons 129325, in the Spring Catalog. The big one is just so much bigger than I expected. So I thought I'd show you how big it is in comparison to a quarter.
Then the other day I got a letter.
Now the downhill part.
This is my dad and grandma on New Year's Eve. I know they don't look too happy here but trust me they were. They are so much alike.
My grandma passed away last Monday. She was 92. I'm so glad I got to see her one last time and kiss and hug on her.
I'll be going back to Iowa in a few weeks to help my cousin straighten things out with her estate. Grandma was a tough old broad and left specific instructions that no memorial be held and to not even put her ashes in the cemetery until all the snow is gone. My cousin is having a really hard time with that.
So life has been a little topsy turvy lately. Now that I have my travel stuff decided I'm feel like I'm coming up for air. Things are settling down a little.
I have cards to stamp before I leave so I hope I'll be able to show you something stampy here pretty soon.
Thanks so much for stopping by and checking in. You warm my heart.
Blessings, b.
Sunday, January 6, 2013
December Daily 2012
Okie dokie. I took pics of my Dec. Daily album today. So grab a cup of something yummy and maybe even a snack. There are ALOT of pics today.
note: some of the pictures in the album are blurry and over or under exposed. I decided I would rather add a blurry pic than not use it at all. The memory/story is still there even though the pic is not crystal clear.
The final size is 4x6. I will probably just use some binder rings to put it together.
This originally was going to be the inside of the front cover. Grace had wanted to make the cover but then changed her mind. So I turned it over and made this the front. Genius!
The inside of the front cover is just a little bit about each of us during this time in our lives.
The journaling for Dec. 1 is a 4x3 piece of cardstock. I stamped the number on a wood sheet and used the lid of my chapstick for the ring.
I just glued the pictures to each other.
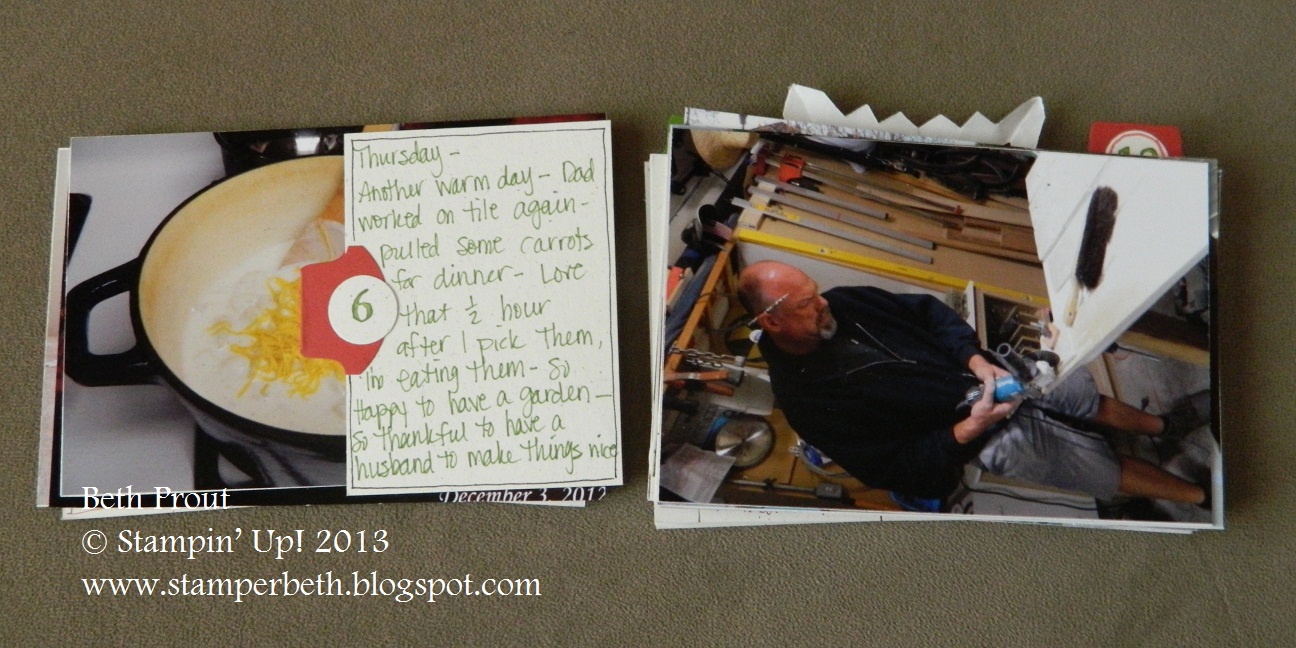
I don't have Photoshop or anything fancy. So I opened Dec. 3 in Paint and put a text box on it and just put the journaling right on the pic.
Some days I had more than one picture. I just added more pages. Simple.
I plan on putting the Costco receipt in here. The green is actually a pocket so I can slip it in.
See that button up there? That is one of the buttons that they were giving away at J.C. Penney. I got a few of them. I took off the pin part and then hot glued it to the tab.
The same day of the Newtown shooting, Grace's school was on lockdown when I went to get her. Talk about scary! I wrote on the pic with my white gel pen.
I did my journaling on a cone wrapper from Coldstone.
On the 16th I did my journaling on a piece of vellum. To cover the glue on the sides I put a piece of sticky strip and then covered it in glitter. I know glitter is not a good thing to have close to pictures but I like it anyway.
Another button from JCP. I got behind on the picture taking and journaling for a week. So I just put them all on one journal page.
I was playing around with picture sizes and found a way to open a Word doc. and put 2 pics on a 4x6 page.
I printed the 3 pics as a wallet size and then just cut them down to fit.
I'm leaving the back of the album blank.
Alrighty then, thats it. I so love this project. A big reason I love this project so much is because there is no right or wrong. It is whatever you choose to make it. Not all of the pictures are perfect (probably none) but they tell my story.
You can see here to find out what Dec. Daily is all about. On the left side of my blog you will see links to my past Dec. Daily albums. Plan on doing it next year. You won't regret it.
Okay, Downton is coming on pretty soon. I have my tea all ready.
Thanks so much for stopping by and hanging with this lllloooooonnnnnnngggg post.
Blessings, b.
note: some of the pictures in the album are blurry and over or under exposed. I decided I would rather add a blurry pic than not use it at all. The memory/story is still there even though the pic is not crystal clear.
The final size is 4x6. I will probably just use some binder rings to put it together.
This originally was going to be the inside of the front cover. Grace had wanted to make the cover but then changed her mind. So I turned it over and made this the front. Genius!
The inside of the front cover is just a little bit about each of us during this time in our lives.
The journaling for Dec. 1 is a 4x3 piece of cardstock. I stamped the number on a wood sheet and used the lid of my chapstick for the ring.
I just glued the pictures to each other.
I don't have Photoshop or anything fancy. So I opened Dec. 3 in Paint and put a text box on it and just put the journaling right on the pic.
Some days I had more than one picture. I just added more pages. Simple.
I plan on putting the Costco receipt in here. The green is actually a pocket so I can slip it in.
See that button up there? That is one of the buttons that they were giving away at J.C. Penney. I got a few of them. I took off the pin part and then hot glued it to the tab.
The same day of the Newtown shooting, Grace's school was on lockdown when I went to get her. Talk about scary! I wrote on the pic with my white gel pen.
I did my journaling on a cone wrapper from Coldstone.
On the 16th I did my journaling on a piece of vellum. To cover the glue on the sides I put a piece of sticky strip and then covered it in glitter. I know glitter is not a good thing to have close to pictures but I like it anyway.
Another button from JCP. I got behind on the picture taking and journaling for a week. So I just put them all on one journal page.
I was playing around with picture sizes and found a way to open a Word doc. and put 2 pics on a 4x6 page.
I printed the 3 pics as a wallet size and then just cut them down to fit.
I'm leaving the back of the album blank.
Alrighty then, thats it. I so love this project. A big reason I love this project so much is because there is no right or wrong. It is whatever you choose to make it. Not all of the pictures are perfect (probably none) but they tell my story.
You can see here to find out what Dec. Daily is all about. On the left side of my blog you will see links to my past Dec. Daily albums. Plan on doing it next year. You won't regret it.
Okay, Downton is coming on pretty soon. I have my tea all ready.
Thanks so much for stopping by and hanging with this lllloooooonnnnnnngggg post.
Blessings, b.
Subscribe to:
Posts (Atom)