Wednesday, July 28, 2010

thanks so much

Howdy!  Quickie post tonight.  I wanted to show you another Artisan card entry since AGAIN I got no stamping done. 


It always makes me happy to see a bunch of cards completed.  I actually sent these to people too.  Imagine that!


Trendy Trees stamps.  Crumb cake, old olive, whisper white and melon mambo cardstock.  Whisper white craft and Black Stazon inks.  Corner rounder, scallop edge punch, little leaves die, big shot, 2 step bird punch, black gingham ribbon, stampamajig, polka dot embossing folder (wart maker) and dimensionals.


I had made a bunch of these to send as thank you's for my birthday.  I decided they were so cute, I made a few more and sent one in for the contest.  Talk about easy to make!  Quick, quick, quick!


I used the 2 step bird punch to make the flower.  Can you see it?  I punched out the wing 3 times and glued them together. 


I'm so sad they retired all the gingham ribbon.  I liked it.  You can see here that I only tacked down the stem  of the little leaves die.  That way the leaves could reach out, (and touch someone, ha).

After I used the polka dot embossing folder I swiped my whisper white craft ink over the raised dots.  Since they took away my polka dot background stamp set I had to figure out a way to get white dots.  I'll show them!

Alrighty then, I'm off to bed.  The boy finally got home from band camp and I can go to sleep knowing he is safely home. 

Thanks for stopping by and checking in.

Blessings, b.

Monday, July 26, 2010

super star

Hey everyone!  What a weekend we had!  Go go go, busy busy busy.  Then today, I had promised the girls we would go to the beach.  So even though it was a relaxing day (except for the wonderful sunburn I brought home...........need to buy more sunscreen, I told the girls to use the rest) I got nothing done at home.  I've got 234 emails in my box, 6 loads of laundry to do, piles of mail on my desk, etc........you get the idea. 

That also means no stamping got done.  So, I'm going to share the last scrapbook page I made for the Artisan entry. 


I {heart} Hearts and Schoolbook Serif sets.  Whisper white, brocade blue, crumb cake and basic black cardstock.  Real red and Versamark inks.  Sprial tab punch, black journaler, 2 way glue pen, dazzling diamonds glitter, 1 1/4" square punch, dimensionals.


Grace is so goofy.  I'm not going to lie, this 12 x 12 page was a pain in the bazooka to put together.   I guess I was running out of ink because the pics kept coming out with this blue tint.  I had a heck of a time with the title too.  


For the title, I ended up penciling a line and then used my stampamajig to keep them straight.  I think the thing that was/is bugging me about this page is all the white space around the title.  It seems naked or unfinished or something. 

I stamped the letters and then used the 2 way glue pen to the word "star" and then added the glitter.  Glitter is very camera shy around me and doesn't like to show off.  I can't ever seem to get a good glitter pic.


Grace absolutely LOVES to have her picture taken.  This day we had errands to run after school and she got ahold of my camera and had a ball!  Gotta love them digital cameras! 

I used the Sprial tab punch to make a film strip.  Groovy huh?  I used the rule of 3's and made 3 hearts and star goodies and placed them in a triangle on the page.  The eye likes to look at things in odd numbers.  The start has glitter on it too. 


Alrighty then, I've eaten dinner, taken my Advil (sunburn) and getting ready to watch the Bachelorette.  My Chris in still in there!  I hope she picks him.  I hope to get some stamping done tomorrow. 

Thanks for stopping by and hanging out.

Blessings, b.

Friday, July 23, 2010

funky birdhouse and exciting news

Hey everyone!  I hope you had a wonderful day. 

Convention is going on right now and I'm not there.  BooHoo.  So I've been lurking in webland living vicariously through others who are there.  My good buddy Susan (hey girl!) let me know this morning that I was named one of the Artisan Award Finalists last night!  How cool is that?  I mean, I think they actually said my name OUT LOUD on stage!  WOW!  Not quite as good as actually winning but, I'll take it.  Made my whole day. 

Here are the list of finalists:

Deborah Paise
Cindy Beach
Heidi King
Melissa Riker
Sandra Farrell
Lynsay Mahon
Beth Prout
Ellen Raymond
Amy O'Neil
Jennifer Thomas
Ilina Crouse
Ashely Van Camp
Ann M. Fitton
Jan Tinklenberg
Deborah Pippin
Rochelle Gould
Staci Lynch
Amy Bollman
Mary Bieber
Lynn Pratt
Jennifer Picard
Jennifer Diercks

I've seen the work of some of these ladies and to be in a group with them is just mind blowing.  They are so talented! 

So today I thought I'd show you my favorite project from my Artisan Award entries.


Eastern Blooms and Woodgrain stamps.  Sahara sand, soft suede, rose red, regal rose and whisper white cardstock.  Soft suede and sarhara sand inks.  Sponging, tombow multi glue, distresser from the cutter kit.


Sorry for the fuzzy pic.  It was taken at the 11th hour. 

My funky birdhouse.  I just love it!  It wasn't intended to be so funky but for the life of me I couldn't line things up properly.  There is no template, sorry folks. 

It stood about 8 inches tall.  It was the first idea I had for the Artisan Award contest and the last thing I finished.  Go figure......


I had wanted to have the look of weathered and whitewashed wood.  I'm not sure I really accomplished that though.  I stamped the flowers in the soft suede and then added little leaves with my old olive marker. 


For the flowers, I used the distresser from the cutter kit.  When you use it repeatedly over one area you start to get these little fuzzies.  I used the rose red, whisper white and regal rose cardstocks and when I was done getting fuzzies I put them all together.  You should have seen the mess! 


Same thing, other side.


the backside.  See the little feet?  I wanted to get wooden beads, but I just ran out of time.  So I very quickly made little rectangluar feeties.  I think I scored at 1/4" and glued them up.  I put them on with the Tombow Multi.  Have I told you I love that stuff?  I love that stuff.  I wasn't in the least worried about anything falling apart.


Ahhhh...........the roof.  This was the hardest part of the whole thing.  There was just no way I could line these up.  And I'm too much of a dork to figure out a good pattern.  I can't tell you the amount of cardstock I went through!  I have 2 or 3 dimensionals between each layer to make it separate. 

This was my favorite and I hated to let it go.  I mean there are things I see now that I could add or do differently but, its funky and quirky and I love it.


On the inside I put some raffia.  And since it was Easter time, I hot glued some blue Robin's Eggs candy in there.  I couldn't send it empty could I? 

The only thing about this project that I don't like is, there is no use for it.  Other than it is totally cute.  The roof does not come off.  I tried playing with that idea but it just wouldn't work.  So it serves no function at all.  Other than it is totally cute.  And maybe a home for spiders.

Okie dokie, thats it for tonight. 

Thanks so much for stopping by and sending/leaving me your comments.  I appreciate it so much.

Blessings, b.

Wednesday, July 21, 2010

Artisan contender #5...........(I think)

Hey everyone,

We've been gone for the last week camping and am now trying to get back into the goove of things.  You didn't even know I was gone did ya?

So now I'm trying to catch up, laundry to do, email to catch up on, grocery shopping, senior pictures (God help me!), dentist and eye dr. appts, etc...........


I actually posted this card in March and then decided a few days later to use it for the Artisan Award.  So I took it off my blog.  I'm going to repost it now and hope it comes out right.  I hope to have new stuff for you in a few days. 

Thanks for stopping by. 

Blessings, b.


Happy Spring!

I know those of you on the East Coast aren't seeing any signs of spring yet but it is getting here real quick.  We hit 70 degrees today and the Swallows are redecorating their nests under the eves.  My weeds are very happy.  I need to get out there and get rid of them..............the weeds, not the Swallows.

So anyhow I thought I would make a springy card today.  I have a thing for Robin birds.  Our oldest daughter's name is Robin and she had quite the collection of Robin bird things.............until she decided she hated her name and either got rid of most of them or they are in hiding.  Ahh, such is the life of a teenager. 

So anyway, I went to the Stamping 411 site to see how easy their sketch was this week.  Verdict: very easy.  So here is my card:


Sanded and Woodgrain background stamps, Itty Bitty Backgrounds and Trendy Trees.  Kraft, old olive, ruby red, whisper white, brocade blue, bashful blue, and choc. chip cardstock.  Bashful blue, choc. chip, ruby red and sahara sand ink.  Little leaves Sizzlit die, 2step bird punch (occasions mini), 1/8 circle punch, small heart punch (occasions mini), large oval punch and small oval punch.


Ever since I got the bird punch I've been wanting to make a Robin bird.  There has been alot of punch art around the web lately so I thought I'd jump in too. 

I had a few issues with the nest.  I couldn't quite figure it out at first.  So I looked at pics of real nests and came up with this. 


I made the eggs with the small heart punch in the Occasions Mini.  Here is how I put the nest together.


1 large oval in kraft, 1 large oval in choc. chip., 1 small oval in choc. chip and a sliver of a large oval in kraft. 


Layer the large choc. chip oval behind and below the large kraft oval.


Layer the small choc. chip oval on top.


Layer the sliver on top of the small choc. chip oval.  Ta Da!


You can see here how much everything sticks out.  I put dimensionals under the nest and under the bird. 


I wasn't sure about this sentiment.  I kept thinking of putting it on the white part but was too afraid of messing up the whole thing.  So I played it safe and put in underneath.   Yeah, I'm so not a "living on the edge" type of person. 


Alrighty then, the finale of The Bachelor is on right now and so I gotta go see who he picks.  I'm sure it'll be Vienna.  I was sorry to see Ali go. 

Thanks for stopping by and checking things out. 

Blessings, b.

Saturday, July 17, 2010

Another Artisan contender

Hey there!  Did you have a wonderful day?  I got a big story to share with you but it will have to wait.   What a tease huh? 

For now, I have another entry to show you.  Ready?


Schoolbook Serif alpha and Medallion stamps.  Going gray, whisper white and basic black cardstock.  Brocade blue and Versamark inks.  Clear embossing powder, ruby red marker.

This picture was taken when we visited my dad after Christmas.  We went skiing in Santa Fe.  Well, they went skiing.  Grace didn't want to go so she and I hung out in the lounge.  It was such an awesome day, snowed the whole time.

Anyhow, I loved this picute and wanted to use it.  You can just barely see the Medallion stamp on the gray.  It looked like a big snowflake to me.  And boy, did we have some big snowflakes that day!  I just need to copy it for my own scrapbook. 


My ruby red marker was running out of ink.  But I didn't have another red marker.  And I can see here that the title is crooked.  I'm sure that is a big No-No for an Artisan winner.  Plus my writing is sloppy.  But, sloppy or not, I think your personal handwriting on your scrap pages is so important.  Years from now your family isn't going to be saying, "Gee, look at Aunt Marge's writing.  It sure is ugly."  Trust me.  They will be thankful for the story behind the picture. 


I also stamped the Medallion on the white and embossed it.  Now it looks like a wet snowflake!  Anyhow, I really do love this page. 

Alrighty then, this old broad is hitting the hay.  I'll share my story with you tomorrow or the next day.  Sleep tight!

Thanks for stopping by.  I love it when you do that.

Blessings, b.

Thursday, July 15, 2010

wonderful concrete

Hidey-Ho!

Concrete is done!  Woo Hoo!


Had a few of the boy's friends over to help. 


Getting closer!


Footing for the retaining wall.  I'm so excited for that to get finished!   Yes, that is one of my zucchini plants dying.  I don't know why.  I'll have to plant another one. 


The Great Wall of China!  It will be nice when it is all done.  So nice!  I'm so glad it over.......for now.  We still have to finish the wall. 


Okay, want to see another Artisan Award contender?  Good, because I'm going to show you.


Wonderful Favorites set.  Whisper white, soft suede, old olive and melon mambo cardstock.  Soft suede and melon mambo inks.  Little leaves die, big shot, curly label punch, Bella Bleu DSP, sponging and paper piercer.


Remember those wrinkly roses I was showing you a few days ago?  This was one of the 3D entries.  A few years ago Target had these little 4x4 frames in their Dollar Spot.  I took some sandpaper and sanded it down to look worn. 


These roses I cut in a wider spiral so they would stand up more.  Click on the link up there to see what I'm talking about.  I also crumpled up the old olive before I cut out the leaves. 


You can see how far out the roses are from the frame.  I stuck everything on with the Tombow Multi Glue.  Love that stuff!  I really like this frame.  I need to make another for me because I had to send this one into SU! 

Okay, bedtime.  Let me know if you have any questions about this project. 

Thanks for stopping by.  You make my heart swell.....in a good way.

Blessings, b.

Tuesday, July 13, 2010

concrete, blood and Molly

Hey everyone!  Was it hot enough for ya today?   We have been working our patooties off and the hubs even got a heat rash.  Who decided to pour concrete in this weather?  Look at what we have been doing


I know, from this picture, my backyard looks like Sanford and Son.  Really its not.  Its just that we had to take everything from the side of the house and put it out in the open.  UGH!!  This is the walkway we're getting ready to pour.


This is the side by the pool equipment.  The neighbors' sprinklers always flood this area and the bugs and weeds love it!  NO MORE!!  Concrete can be a beautiful thing.  We are also pouring the footing for the retaining wall.  All in all, we're pouring almost 8 yards.  Thats alot!

Also today, I popped a blood vessel in my eye.  What the heck!  I had turned my head to look behind me and felt this tingling in my eye, and Grace was like, "whats wrong with your eye?"  I had to go look in the mirror and kinda grossed myself out.  YUCK!  Why does that happen?  It hurt for awhile but now it feels fine.  Just looks really gross.  Apparently I just have to let the blood  reabsorb.  Nice..............

So, since no stamping is getting done and won't, because the hubs has the rest of the week off,  I thought I'd show you some more of the Artisan Award contenders.  At least I hope they were contenders. 


Inspired by Nature and Woodgrain stamps.  Whisper white, creamy caramel, choc. chip, real red, old olive, blush blossom, going gray and brocade blue cardstock.  Old olive, going gray, creamy caramel and brocade blue inks.  Small heart punch, wide oval punch, large oval punch, 1/2" circle punch, dimensionals, big shot, naturally serif alpha die, black journaler and a heck of alot of sponging. 

Remember Molly?  I was so fascinated by her.  I was trying to hurry up and get all the Artisan entries done and everytime I heard a noise on the computer I would stop and see what she was doing.   

For the contest I had to make 3 scrapbook pages.  This was my last one.  I really like it but of course I can see things I would change now.


Molly was the female and her hubby was McGee.  So I punched out 2 little hearts and put "M"'s on them.  There was a ton of sponging going on here.   This is what the actual nest box looked like. 


The kiddos really didn't get what all the fuss was about.  But it was so interesting!  I even got to see one of the babies hatching!  Very cool.   I freehanded these clouds and really had to cram in all that writing. 

I can see now that this wasn't exactly award winning quality but I had a great time making this page.  Thats what counts right? 

Alrighty then, I'm pooped!  I can't wait for the concrete to be all done.  Whew!

Thanks for stopping by and have a wonderful Wednesday!

Blessings, b.

Saturday, July 10, 2010

15 is now 16

Hey everyone!  Sorry for the absence.  We have been super duper busy around here and by the time 9:00 hits, I'm ready for bed. 

We have been crazy busy getting ready for concrete.  I'll be glad when thats done. 

And the big news:  15 had a birthday! 

I can't believe she is 16 already.  Time just flies by doesn't it?  I took her and a few of her friends ice skating.  I opted not to skate this time.  My knee still isn't quite right from the last time I went.  Old lady here.

She doesn't like people to pay much attention to her so she wouldn't let me give her a big party.  And its nearly impossible to take a pic of her.  So I told her I wouldn't put her pic on here.  But, here is a pic of the card I made:


Wonderful Favorite and Letterpress numbers (retired). Pacific point, tempting turquoise, pear pizzazz and whisper white cardstock.  Pacific point and tempting turquoise inks.  1/2", 3/4" and 1" circle punches, corner rounder, turquoise grosgrain (retired), polka dot embossing folder, tombow multi glue and dazzling diamonds glitter. 


A few months ago we got her a new set of sheets and comforter for her bed.  It is a circle pattern with blues and greens on it.   So I thought I'd use that for inspiration for this card. 

I did some faux dry embossing on it.  I punched out some circles of the same color cardstock as the base and just glued them on.  Looks like dry embossing! 

See that green?  That is a new In Color, Pear Pizzazz. 


This circley/badgy/blue ribbon looking thing is really easy to make.  I had the idea of making her a badge/ ribbon type thing that said, "Its my birthday" for her to wear ice skating, but she said she would never, no way, no how, absolutely not, ever going to wear something like that.  So, I made one for her card. 

Here is how you make it.  Take a 1" strip of cardstock, mine was 11" long, and score it every 1/4".  Then glue the ends together.  Punch out a 1" circle and cover it with sticky strip.  Then coerce your accordian into this shape and press it into the sticky strip.  Its easier than it sounds.  Try it. 

I put some glitter on there for good measure. 


It does stick out quite a bit and if you were to mail something like this, I would use a padded envelope. 

Alrighty then, thats it for tonight.  I've been working on a big project that I'll show you in a few days.  Its not quite done yet.  I hope to get it finished tomorrow. 

Thanks for stopping by and being patient.  You guys are the best. 

Blessings, b.

Tuesday, July 6, 2010

Stampamajig love

Howdy!

I hope you had a nice holiday.  The hubs had yesterday off so, you guessed it, we worked.   We are getting ready to pour concrete on the side of the house and the footing for the retaining wall.  So we've (meaning, the kiddos) have been digging and digging. 

Anyhow, today I tried to catch up on things. 

So no new stamping today.  But I never showed you the make 'n' take I had for the yard sale. 


Watercolor Trio set.  Crumb cake and very vanilla cardstock.  Soft suede ink.  Newsprint DSP, large oval punch, vanilla taffeta ribbon, scallop border punch and a sponge. 

I wanted something that used new goodies but that was also super simple to make.  I stamped the leafy image twice without reinking. 


I love this new Newsprint DSP!  I've been wanting something like it for a long time.  I've tried using old books but the problem is, they aren't wide enough.  This stuff is great though!  I can make it whatever size I want. 


Here is the story behind this little tag. 

I have Watercolor Trio in the Clear Mount option.  The stamps are much cheaper that way.  BUT, this set has words.   I like my words to be straight.  I LOVE my Stampamajig.  We are BFF's.  So I've been sure to buy stamps that are mostly words, in wood mount.  That way I can make a Stampamajig template and keep it in the box ready for me. 

So instead of using the Stampamajig for this, I thought I could just wing it.  Yeah, I don't wing it very well apparently.  I didn't want to stress out my customers either.  So, I decided to stamp it and punch it.  Much easier.  Looks good too. 


Alrighty then.  I can't leave you without a few pics from the 4th of July and our illegal fireworks. 


Grace got her nails all ready for the occasion.  Toes too.


It got kinda chilly outside.  Grace even put on her Spongbob pjs for the event. 


The snakes were so fun!  Of course the big kids thought they (and me) were lame but, whatever!  They were much smaller than I remember, but I guess most things do as grown ups.  They kept some to play with yesterday too.  Good times, good times. 


Then we set off some fountains.  I think we had about 10 and even though they all had different names and different shapes they almost all looked alike. 


Grace sat upstairs and watched with ear plugs in.  Thats my party girl!  I have to say though that the older 2 were also extremely careful around them.  Making sure they were completely out before putting them in the bucket of water and running for the hills as soon as they were lit. 

Okie dokie, thats it for tonight.  I have a couple of big projects that I would like to have done by next Tuesday.  hahahahahahahahahahahahahah.................ha.   I crack myself up!  Its good to have goals right? 

Thanks for stopping by. 

Blessings, b.

Sunday, July 4, 2010

Happy Independence Day!

What do you have planned for this 4th of July?  We are BBQing, swimming and lighting off illegal fireworks.  Fireworks are illegal in our county.  Yep, I'ma gonna break the law.  So if you don't hear from me again, I'm in the "big house".  Just kidding.  We are very responsible and keep a hose and bucket of water close by. 

The city we live in has a huge firework display on the last Saturday of the month to celebrate the city's birthday.  So we did get to see big fireworks last weekend.  Grace absolutely hates the noise.

Where I grew up, fireworks are legal.  Well the "Safe and Sane" ones are.  When I was a kid, all over the city, as soon as it was getting dark, the whole neighborhood would go outside in the street and take turns setting off fireworks.  It was so magical!  All the kids running around with sparklers and drippy popsicles.  We would take turns getting the burnt-out fountains and putting them in a bucket of water and setting up the next one. 

For the next week, my brother and I and our friends would pretend to work the fireworks stand and take turns selling the used fireworks back to each other.  Weird, I know. 

Well today, we just happened to be close to my inlaws house and I stopped at a firework stand and bought "Magic Snakes".  I used to love those things!  I can't wait for the kids to see them tonight!  Kids today are so used to bigger and better things that they may not see the fun, but I'm ready. 

I did not make a special card for today but I did find a picture of one I made last year. 


Independence Day (retired, but I have it for sale) and Polka Dot background (retired).  Brilliant blue, kraft, whisper white and real red cardstock.  Real red, brilliant blue and whisper white inks.  Corner rounder, real red wide grosgrain ribbon, scallop border punch, 1 3/8 and 1 1/4 circle punches.


I think its pretty cute. 

Alrighty then, I'm going to bed.  The garage sale went pretty well.  We made enough money to pay for gas for our camping trip coming up.  Thats a good thing!  I still have a bunch of retired sets so go check them out. 

Thanks for stopping by.  Have a Safe and Sane 4th of July!

Blessings, b.

Friday, July 2, 2010

wrinkly roses

Hey everybody!  I hope everyone had a great day.  I just got done putting the finishing touches on the make 'n' take and the goodie bags for tomorrow.  I only got one more tag done today.  Its awesome! 

Medallion and Favorite Thoughts (summer mini).  Not quite navy, sahara sand, old olive and NEW Poppy Parade (In Color).  Black Stazon and white craft inks.  Paper piercer, Little Leaves die, white taffeta ribbon, scallop edge punch, curly label punch and hemp.

Pretty huh?  It came out even better than I planned.  Which is cool because that never happens. 

I had the idea of making some wrinkly roses but that was it.  I decided to use a new In Color.  I love this Poppy Parade.  Its a bright reddish orange.  Well, I wasn't sure what colors would go with it (besides Crumb Cake) so I looked at the NEW AND IMPROVED COLOR COACH.  Check this bad boy out


You get a swatch of every color!  Look at the backs


Awesome!  On the back of each color swatch it gives you 2 different color combos.  I used the bottom 3, Sarhara Sand, Not Quite Navy and Poppy Parade.  After I looked at the colors I thought, "hey, those could be kinda patriotic."   Anyway, I love how it turned out.


I started thinking about making the Medallion look like a lace doily.  So I stamped it in white on the Sahara Sand and then cut it out and paper pierced eveywhere there was a dot. 


The words look crooked here but they really aren't.  Its just my mad photography skills showing off again.  For the top I just punched out a Curly Label and folded it in half.  Rocket science. 

Now here is the fun part.


They're so pretty! 
So you want to know how I made these?  Check it out


The biggest flower is a 2 1/2" circle.  The smaller ones are punched out with the 1 3/8" punch. 


Get your aggressions out and crumple the heck outta that circle.


Cut around and around and around in a spiral.  The smaller the width of the spiral the flatter the rose.  I cut this at about 1/4".  Does that make sense?  The wider the width, the higher the rose will sit.  I'll show you what I'm talking about in a minute.


Now starting with the outside edge, roll it in on itself.  Like this


Just keep rolling until the center of the circle sits on the bottom.  Like this


Sorry for the fuzzy pic.  Moving on.......


See how tight it is?  It won't stay that way.  Just let it go and set it down.


 It will start to loosen up.  Now, if we didn't scrunch the heck out of it first, then it would really be loose.  Sometimes I have to help it relax a little by taking the center with my tweezers and unrolling it a little.


Once you like the look of it.  Take your wonderful Tombow Multi Glue and smear some on the bottom flap.


Fold it up.


It will only take a few minutes to set. 

Now remember how I was saying if you made the spiral wider?  Here is what that will look like


Still very pretty but it sits much taller.


The one on the right is what I made for the tag.  The one on the left is what I made for one of my Artisan Award 3D entries.  I'll show you someday. 


They look basically the same on the top. 

So go make some wrinkly roses and show me what you made.  I would love to see.

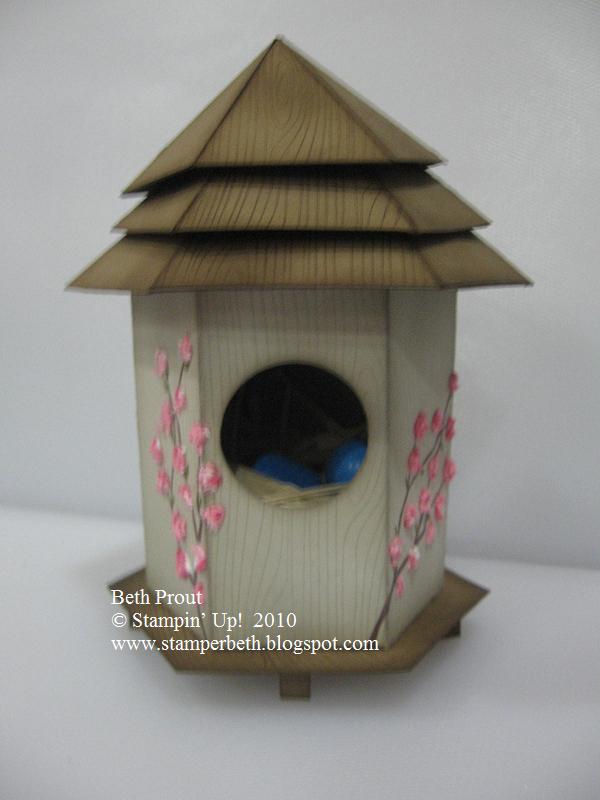
Remember the bird tag from yesterday?


I wanted it to say something but I couldn't figure out what.  Look what I came up with


I think its cute!  I used the "hello" from  the "hello again" set. 

Alrighty, all the goodie bags are ready to go. 


I'm hoping I have to make more.  Every person who buys some retired stamps gets to choose one of these.  That goes for people I have to ship to also.  So go check out those retired stamps and let me know what you want. 

Okie dokie, I gotta get up early so I'm going to bed. 

Thanks for stopping by.  You make me feel all warm and fuzzy when you do.

Blessings, b.